Time to hide all those hoses! The next step involved laying down about 12 cm of thermal (styropor) insulation, installing the floor heating+ and pouring 6 cm of concrete on top. With the gaps in the perforated drywall ceiling filled and the walls receiving their first coat of paint, the room is now one step closer to its finished look. A second layer of gypsum fibreboards was added to the vertical walls for extra sturdiness and also to ensure a more precise fit for the doors.
The next step is fine assembly of electrical installations. However, there’s currently no place to mount the switches or sockets, as they’ll eventually be integrated into acoustic ‘closets’. For now, the cables will be secured with terminal blocks to take the required measurements and get the house official power supply.

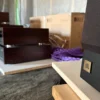
Time to sprinkle some style
Deciding on the wall colors took some thought. A vintage color scheme is preferred, so it looks like the brownish tones will get the nod this time. A quick study on lighting was also conducted, leading to a decision to install two recessed lights. They had to be low depth to fit into the 6 cm deep space above. I found some sleek, slim black 150 cm modules with a warm light temperature (3000 K) and 4500 lumens of light output.
The average light intensity calculated was approximately 200 lux, though based on my experience, this should suffice as these lights are only used occasionally during gear installation or cleaning. Being cautious, I bought three of them—better safe than sorry in case one decides to quit on me!